Import Offline Emissions Data
With the organization structure, entity settings, and role permissions now in place, operators can begin importing emissions data for the entities assigned to them.
Manually Input Monthly Data Records
For offline records and invoices, you can input data into system manually.
Prerequisites
Contact your system administrator if your account does not meet the below requirements:
Ensure your account has the
operator,view adminorsuper adminrole for access to data entry features.Ensure your account has permission to manage the related entity data.
Ensure that the entity data resource is Key-in.
Accessing the Data Entry Page
You can access the data entry page from the preview dashboard:
Click on Data Management > Organization in the left navigation pane. Select the view where you want to record data.
Select your target entity card from the preview dashboard, the entity emissions data sidebar will expand to show details.
Select Details button and you will be directed to the selected entity’s Data Entry menu.
You can also access the data entry page from the navigation pane:
Click on Data Management > Data Entry in the left navigation pane.
Select the view and entity from the drop down menu, then select the corresponding accounting standard.

Note
Only entities with Key In enabled as the data source can configure data entry.
Emissions Data Entry with Data Key In
You can enter the emissions data for each entity by the following steps:
Specify the time period of your emissions data in year and month.
Note
In the month tabs, green dots indicate that all category fields have data entered for that specific month, yellow dots indicate partial data input in the records where certain category rows contain incomplete data. No signage indicates no data entries for that month.
Click and expand the scope and emission category tabs that correspond to your emissions to access the data entry menu.
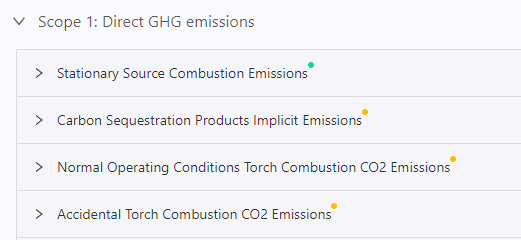
Note
Likewise in the category tabs, green dot indicates complete data fields entered, yellow dot indicates incomplete data, no dots indicate no data records for the entry.
Click Add a row to create a new emissions row.
Emission Source: Select the emission source from the drop down list.
Dimension: Select the data conversion factor for your emissions activity. For example, when the emission source is Diesel, the data conversion factor can be volume, weight, or energy(heat), corresponding to the activity data units: gallon, g, or J, respectively.
Activity Data: Click add data button
 to expand the sidebar, enter the consumption data and respective parameters, select the unit, and click Save.
 Factor Value: Select the factor value button
 to expand the factor value library, then select a factor value based on the year, factor source, and region of your choice, and select Save.
The current factor database includes factors from Scope 1, Scope 2, and Scope 3 emissions. It includes factors published by IPCC, BEIS, EPA, IEA, ADEME, Defra, AIB, ICE, CIDB, as well as factors released by the Ministry of Ecology and Environment of China, the National Development and Reform Commission, and various provincial and municipal authorities.
Search for factors by name or region, filter factors by source and type, and quickly select the desired factors.
Click the Details button allows you to see the GWP value and the split greenhouse gas emission values associated with the selected factor.
(Optional) You can click Calculate to generate and preview the converted carbon emissions value, then adjust emissions data as needed.
(Optional) You can also take notes, update documents or delete unnecessary activity data.

(Optional) Repeat the above steps to enter new emission data row records.
Click Save to save all the above data records into the system and trigger system calculations for emissions conversion, updating the data display in preview mode.
Note
Always save the data before leaving or refreshing the page, otherwise your data will be lost.
Bulk Import Data for Multiple Months
To speed things up, you can import data for multiple months all in one entry through Excel upload.
Prerequisites
Ensure your account has the
view admin,super adminoroperatorrole.Ensure that entity configuration steps are completed.
Ensure that you have created and enabled an emission template for the entity.
If not configured, contact a
super adminuser to set up an emission template for your business entity and then assign it to your business entity.
Procedure
Import data in batch by the following steps:
Click on Data Management > Data Entry in the left navigation pane.
Select the view and entity from the drop down menu, then select the corresponding accounting standard.
Click on the Advanced Tools in the top-right corner, and select Batch Import Activity Data from the dropdown menu to expand the sidebar.
Under the Import Mode section, choose the import type.
Simple Import: This mode supports batch import of the lowest-level entities. You can import data by selecting multiple emission activities and exporting the template.
Advanced Import: This mode supports batch import of root entities or intermediate-level entities. You can only import data by selecting a single emission activity and exporting the template.
Under Activity Name section, select the category you want to report on, and click Export Template to obtain the template.
In the template, each emission source will be displayed in a new row. Enter the data records for the current month in the consumption column, while other data fields can be optionally filled based on the circumstances.
After completing the data entry, return to the sidebar. Select the year for which you want to import the data and click Select File to upload the completed data template. Finally, click Import.
Under the Import Log section, you can check the status of the file upload.
Upload Success: The imported data will be saved under the relevant emission sources and activity categories.
Upload Failure: Click the Details button on the right to see the number of failed entries and the reasons for the failure. Make the necessary changes and retry the upload.
Note
If there are pre-existing data records, Excel uploads will overwrite existing data. To retain existing records, keep that month’s cell blank in the excel template. Do not enter any value, including 0.
For consumption, factor uncertainty, and activity data uncertainty fields in the Excel template, input only numerical values to avoid import errors.
Understanding Entity Card

The table below explains the data displayed in the entity card.
Data |
Description |
|---|---|
Baseline |
Sum of emissions and abatement, displaying the original greenhouse gas emissions scenario without any emission reduction measures in place, to show the amount of emissions avoided. |
Emissions |
Actual emissions of the organization aggregated from data reporting, IoT data metrics, Bill invoice OCR or 3rd party system integration |
Abatement |
Carbon emissions reduced as a result of abatement initiatives and REC purchase. |
Offset |
Carbon emissions offset due to the purchase of carbon credits. |